10 Mar 2015
If you're a longtime reader (as in, the 2 months that this blog has been in existence), you may have noticed some changes. That's because I just changed blogging platforms from WordPress to Jekyll.
Why Change?
In January, I was learning some new things (Rails, Ruby, Agile, etc.) and I had no time to customize a blog the way I liked it. Nevertheless, I needed some place to document what I've learned and connect with people. So I decided to put up a blog as quickly as possible. The only requirement was that it must take almost no time to set up. I was already familiar with WordPress, and have set up several WordPress blogs before. So I set it up, downloaded a free theme, and voila! I was in business.
Two and a half months later, I still like my blog a lot, but it looked cluttered. I started to admire a lot of the other blogs for their minimalistic beauty. The content was front and center. Most of these blogs were hosted on either Ghost, Medium, or GitHub Pages. I decided to look into these options.
Why GitHub Pages? Why Jekyll?
GitHub Pages is hosted on GitHub. You automatically get one site per GitHub account, and when you push any changes to it, it gets updated. No further work needed! I was attracted mostly to the convenience of updating the blog where I would update my other code--in my text editor. It reminded me of the early days when the internet was just a bunch of static HTML pages, and I'd log into the server to edit my HTML files directly. On top of GitHub pages, you get Jekyll:
GitHub Pages are powered by Jekyll behind the scenes, so in addition to supporting regular HTML content, they’re also a great way to host your Jekyll-powered website for free.
Jekyll is so cool! With it, I can write all my posts within my text editor using beautiful Markdown instead of ugly HTML or dealing with buggy WYSIWYG interfaces! GitHub Pages and Jekyll provides all the advantages of a static site (speed, simplicity) with all the advantages of a dynamic site (DRY-ness). Every time you push the site, Jekyll generates all the static pages for you based on the templates and code you've written. So despite the fact that it's a static site, if you want to change the layout or colors or even functionality of your site, you can do it in just one place.
Jekyll works with regular HTML pages too, so I didn't have to convert all my old posts to Markdown.
Here are the other advantages of using GitHub Pages / Jekyll:
- since content is static instead of in a database, all my blog content is version controlled and backed up on GitHub
- static pages mean non-executable and secure pages! I don't have to worry about someone hacking into my blog if I didn't update to the latest WordPress release
- design-wise, it is so simple. I can do anything I want to the site, it's simply a matter of changing HTML, Markdown, and CSS files
Setting it up
There's nothing that technically extraordinary about my set-up that I need to write a whole blog post about it. I followed this tutorial, but instead of only using Poole, I also used a Poole theme called Hyde. The difference? Poole isn't exactly a theme; it comes with all types of default settings on top of Jekyll to give you a solid foundation to build upon. Hyde, on the other hand, is a theme and is built on top of Poole.
The second tutorial I used was this blog post which helped me implement tags.
Downsides
The only downside is that I've now lost all of the great comments you've left on my blog. I still have them, of course. But they are no longer on this version of the blog for everyone to see. But since I've implemented comments using Disqus, it will be pretty easy for you to leave comments on this site from here on out. You don't even need a Disqus account, as you can use OAuth to log in through Twitter or any of the other social networks.
One additional note
OK maybe two. First, the related_posts method that comes with Jekyll is sorely lacking. Luckily, I was able to find a plugin for it, and since Jekyll is written in Ruby, plugins are just Ruby classes that monkey patch existing classes. This means that if I didn't like this plugin, I could change it without having to learn a new language.
Second, and this is the unfortunate part, GitHub Pages disables all plugins by default, for security reasons. So even though the related posts and tags plugins work fine on my local Jekyll server, it doesn't work when pushed to GitHub.
Here's the workaround: When you run Jekyll, it generates a static site. When you push to GitHub, GitHub Pages knows to run Jekyll on those files and publish the static files that it generates. But we don't want GitHub to run Jekyll for us because its version of Jekyll ignores plugins. We want to run our own Jekyll and tell GitHub to use our own statically generated pages instead!
So what we need are two repos. One to hold the Jekyll site, and one to hold our own statically generated site.
This second repo must be named github-username.github.io because that's how GitHub Pages knows its the repo to publish. So what I had to do was rename the current jimmylorunning.github.io repo to jimmylocoding.com. This will be the first repo mentioned above.
For the second repo, I go to GitHub and create one named jimmylorunning.github.io. I go to my local _site folder (which is where Jekyll stores the statically generated site) and type git init. I add all the files, commit them, and push to jimmylorunning.github.io as its origin. From now on, whenever I make any changes to my blog, I will have to commit my jekyll files to the jimmylocoding.com repo, run jekyll serve or jekyll build (which I should run anyway, just to test my changes before pushing), then commit all my generated _site files to jimmylorunning.github.io.
25 Feb 2015
I said I'd write a little bit about some of the challenges I encountered while writing the CSV Geocoder utility. So here's a small problem and solution:
Problem:
The purpose of the class is very simple. I want to add geocode data to the CSV, then write it to a file. So I write a method like write_csv_with_geocode(file) that joins the CSV with the geocode data and then writes it to a file. However, this violates the single responsibility per method principle. It does two things: adds the geocode data, then writes it to a file.
def write_csv_with_geocode(file)
  merge_csv_with lat_lngs
  CSV.open(file, 'wb') do |csv|
    @csv.each do |row|
      csv << row
    end
  end
end
I could break the method out into two separate methods, but I know that in 99% of the use cases, the user will want to add_geocode then write. The two responsibilities are intimately related in this case. So the user would have to type two methods (three if you count the initializer) instead of one every time, like this:
data = CSVGeocoder.new 'data.csv'
data.add_geocode
data.write 'data_with_geocode.csv'
which wouldn't be so bad if it weren't something they'd have to do every time for such a simple task.
The upside of having it all in one method is that I can accomplish two related tasks in one method call instead of having to call both of them separately every time.
Solution:
Chaining! I make add_geocode assign the new value to an instance variable, then return self (returning self is the key to making methods chainable). Then the write method takes the instance variable and writes it to a CSV file. So now the user can do the simple task in one line, and the operations are also separated into their own methods. Best of both worlds! In fact, I realized I could do the same with all of the methods in the class, so that you could now write the following line:
CSVGeocoder.new('data.csv').add_geocode.write 'data_with_geocode.csv'
Isn't it pretty? Here's the new code:
def add_geocode
  @new_csv = merge_csv_with lat_lngs
  self
end

def write(file)
  CSV.open(file, 'wb') do |csv|
    @new_csv.each do |row|
      csv << row
    end
  end
end
What do you think?
Is chaining a good solution to this problem? How would you have done it? Also: are there other ways I could improve this class?
24 Feb 2015
This past weekend, I attended my first hackathon-like event (there was no competitive element, so it's not a hackathon, technically speaking). Organized by Code For Atlanta and hosted by the Center for Civic Innovation as part of an international CodeAcross event, we met in South Downtown Atlanta to tackle the problems there, namely, how to revitalize the neighborhood.
In order to tackle the problem, we first had to understand the problem. So after a quick presentation on the history of the area, we took a walking tour of it. This introduction was captivating, but at the same time, I didn't see eye to eye with our hosts.
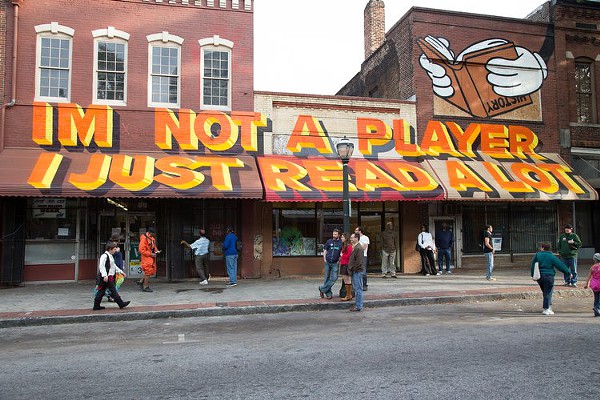
Many of the participants of this event were not from this area. They see it as a dilapidated poor neighborhood that needs to be cleaned up. But I live within 5 miles of South Downtown and enjoy biking through the area. I also regularly attend shows at the Eyedrum Art Gallery and Mammal Gallery. Yes, the neighborhood is poor, but people live and work here too. Often when we say we want to revitalize a neighborhood, it means gentrification. When we say we want to attract new developers, we're also implying that we want the old businesses out. That means Friedman's Shoes, who's been serving large feet since 1929. That means the local charm of Rondo, which sells hexes, charms, and mojo powder.
But I wasn't completely against the enterprise. I agree that many things could be improved in this area. But I tried to steer our group into thinking about what those needs were based on what the locals wanted instead of what tourists would want. To improve the area, we must improve the lives of the people in the area, not bring new people in.
Perhaps this is all too political for a tech blog, so let me go back to describing the rest of the weekend's events.
We broke into three groups:
- Branding and storytelling - how to brand the neighborhood to attract the 'right' elements
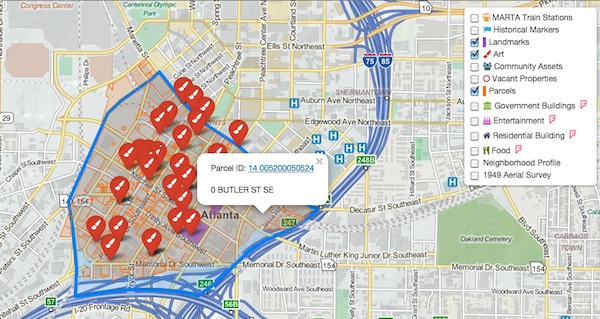
- Interactive asset map - so people can see what's there and what can be there
- Participatory tool - to gather opinions from the community about what the area needs
I joined the second group because I was interested in mapping and because I felt like I could learn the most there. First we talked about who the audience for the map could be, and given that, what assets we could or should map. Then we broke into two groups, one responsible for data gathering and one for building out the map with the given data. I joined the latter group, which consisted of four people: me,
Mollie,
Luigi, and
Bryan.
Mollie was the resident expert on maps and mapping. She showed us how to use Leaflet.js to quickly build out maps and create interactive event based behaviors. While she built out a prototype, the rest of us went through some tutorials to get acquainted with Leaflet, and also explore other possibilities like Mapbox.
After that, I started to think about where I could be most useful. Since Mollie was already kicking ass on the maps, I thought I could do something to help import the data. The data gathering team was sending us Excel files with street addresses. In order to plot the points, geocode data was needed, which just means latitude and longitude. So I decided to write a small utility that would take a CSV file and write a new CSV file with all the existing data plus latitude and longitude.
Writing a script to do that wouldn't have taken long, but I thought this might be a tool that could be used in the future by Code For Atlanta or other similar groups faced with this same problem. So I worked on a Ruby program that could potentially be re-used in other projects. You can see the code for it on GitHub, and I'll probably write a follow up post soon on a few interesting design challenges I ran into.
Day 2
Things began slowly with coffee at 9am. A few folks stared into their laptops like zombies. I was one of those. My CSV Geocoder was working, but I couldn't help tinkering with it, refactoring and improving it (in fact, I was still doing that earlier today). But more of the data was coming in in different formats. I was looking for a new task to do.
One of the things Mollie implemented the day before was integration of Foursquare data from their API. We were now pulling in data about government buildings in South Downtown. But what other Foursquare locations could we map? I wrote some scripts to automate this query. Other than that, I did some research on icons, and I also talked with members of the other teams about what they were doing.
At the end of the day, we all presented our projects. It was inspiring to see how much progress we made in just two days, and also to think about how all three projects will integrate into one larger project. The map will live on the website that the branding group created (which will eventually live at southdowntown.org) and the participatory tool created by the third team will eventually feed back into the map and website so that the wishes and desires of the locals will be our guide.
Speaking of the future, this weekend was just the beginning of a longer effort. We will continue to meet about once a month to continue developing this project.
Overall, I had a great first hackathon. I met some amazing people and learned a lot from them. I worked on interesting projects, and I got to become more familiar with a local neighborhood.
To learn more about the details of making the map, creating the layers and interactions, go read Mollie's excellent blog post about this same event! It's pretty great. You can also see the source of both the asset map and my CSV geocoder on the codeforatlanta GitHub page.
13 Feb 2015
So I decided to revisit my week 3 app, TwitterFitter. At the end of week 3, it was a simple app that generated tweets based on a Twitter handle. The tweets it generated would be in the style of the Twitter account you gave it. It does this by chaining together words that often appear together. But there were a lot of things lacking in the app, so this week I revisited it and made it much better!
Version 2.0 of Twitter Fitter has a new design (it was just a white page before), and you can now enter TWO twitter handles and the app will generate tweets based on BOTH feeds combined. Also, you can now tweet the results (it tweets from the @FitterTweets account).
Most of these enhancements were straight forward, but there were a few tricky parts:
- At first, the generated tweets appeared on the results page and when you clicked "Tweet!", it would tweet whatever was in the text field. But then I started thinking: is this a magnet for spammers? Anyone could just erase what's in that text field, type something new in, and click "Tweet!" and it would look like it was coming from the @FitterTweets account. This is a major security flaw, and even though there many ways to hide this information, like making the field uneditable and in a POST action instead of a GET action, people could still easily spoof it. So instead of sending the tweet from a form, I saved the generated tweets in a Tweet model as soon as they are generated. Then in the results page, in addition to showing the tweets in a text field, I also include a hidden field with the ID of the generated tweet (from the model). So when you click "Tweet!" you're not actually tweeting anything from the form, you're just saying "tweet this previously generated tweet with this ID". So everything that is tweeted from the account is pretty much vetted and safe (at least I hope so).
- My controller was getting pretty fat, and I had to look at it long and hard and figure out how to refactor it. I decided to make a Feeds class, which now lives in the lib folder. It wasn't easy breaking apart the fat methods in the controller, but I'm glad I did because it looks much cleaner this way.
To Do
Tests! For the Feed class and for the controller. I'm not very good at writing tests before the code, but as long as I write the tests some time, that's probably better than never.
Please take a look at my code on GitHub, and play around with it on Heroku. Any feedback is welcome!"